Replacing the 3 oil seals on the Datsun 240Z R180 differential is a fairly basic, do-it-yourself project. Since it was out, I had my differential inspected by a local drive-train shop (Unitrax Drivetrain Inc, no charge for a bench inspection if the differential is removed from the car) and the report was the differential is in very good shape. No repair or adjustment needed.
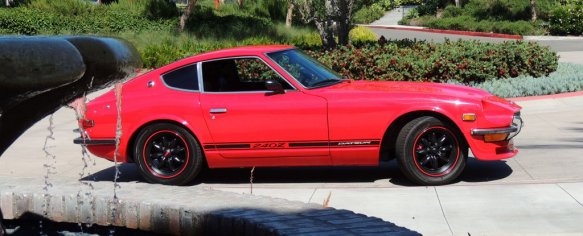
1970 Datsun 240Z differential and rear suspension

Removing the differential
First, the R180 differential is heavy, and there is no good place to hold onto it, so be very prepared for some physical work.
- Jack the car and secure on jack stands.
- Remove the propeller shaft (drive shaft). There are 4 bolts at the differential-end that hold the drive shaft in place. Remove these and the drive shaft should drop loose from the differential. Some ‘persuasion’ may be necessary. The drive shaft should slide easily out from the rear of the transmission.
Warning: With the drive shaft removed from the transmission, there is now a large hole where transmission oil can pour out if you jack the car such that the nose is higher than the tail. (it makes a huge mess). I suggest putting a latex glove over the back of the transmission and secure it with some rubber bands. Better safe than your own personal Prince William Sound on your garage floor
Now is the time to inspect the U-joints on the drive shaft. Replace the if necessary. If the exhaust will be in the way, save yourself some grief and, if you can, remove enough of the pipe to allow unobstructed access to the differential. This may not be practical if your exhaust system one-piece. Remove the half-shafts. Depending on how long it’s been, this can be some work. Not particularly difficult, but a lot of physical work. See my post on 240Z Half Shaft Refurbish. Loosen the Transverse Link Inner Bolts (Figure RA-2 red arrows). No need to remove them.
- Support the differential. If you have access to a transmission jack, this is perfect. You can use a floor jack, but be aware that the differential will easily shift around and possibly fall off the jack. You can also use the ‘stack of boards’ approach.
- Remove the four bolts securing the differential front member (Figure RA-3 red arrows)
Remove the two nuts securing the differential to the mustache bar (#2 Differential case mount rear member) - Scoot the differential toward the front of the car until the two studs clear the mustache bar.
- Lower carefully


Parts
- 1 each Front Oil Seal. Nissan 38189-U3001
- 2 each Side Oil Seal. Beck/Arnley SEAL OUTPUT SHAFT/DIFFER SIDE #052-1401
- 1 each (optional) differential gasket Nissan 38320-U3011


The R180 differential

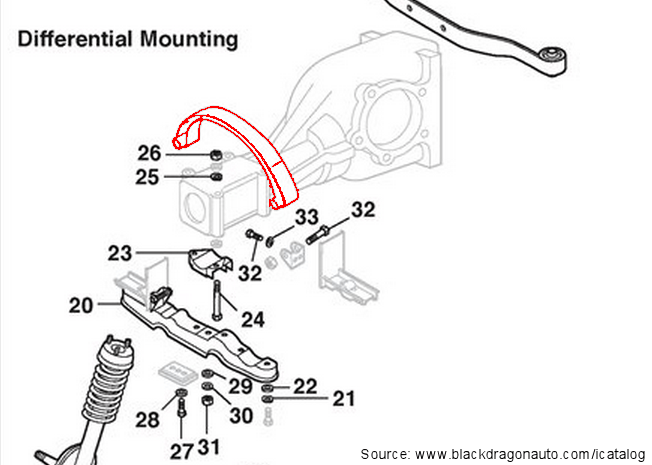
Inspect the differential mount
The rubber should be in good shape with no deterioration, tears or separating from the metal. If there are any issues, just replace it. Cheap insurance.


Inspect the restraining strap
A leather strap goes over the ‘nose’ of the differential to prevent it from pulling upwards and putting too much stress on the differential mount. Inspect the strap to ensure it is still capable of doing it’s job.
I do not know if the differential strap is still sold anywhere. I am going with a more robust solution from TechnoVersions LLC (below).
Here are photos of my installation on the TechnoVersions website.


Replacing the front seal
Clamp the front flange in a vise and remove the nut and washer. An air hammer works great, otherwise a breaker bar. It is a 27mm socket is required. Remove the flange. Remove the front oil seal. Use extreme care so as to not damage any part of the mounting surface.


Replacing the side seals
Remove the side flange bolts (#24 in figure PD-4). These flange bolts have a lock washer, a flat washer and a small, triangular o-ring (see photo in the gallery below). Remove the sub axle.
To prevent confusion, I ran a tie wrap through one of the stub axles and a second through one of the mounting holes on the same side as that stub axle. Not sure if it matters if these get reversed, but why take the risk?


Reassembly
Putting it all back together is pretty much the reverse of taking it out/apart.
Also, remember to put gear oil back in the diff. Easy to forget in the excitement to get it all together again.
Torque values
| Drive Pinion Nut (#36 in Figure PD-2) | 122.9 to 144.6 ft-lbs |
| Bolt Side Flange (#20 in Figure PD-2) | 13.7 to 18.8 ft-lbs |
| Rear cover fix bolts | 13.7 to 18.8 ft-lbs |
| Gear carrier to rear diff mounting member lock nuts (# 14 in Figure PD-2) | 54.2 to 68.7 ft-lbs |
Resources
www.classiczcars.com/topic/46166-r180-side-rear-seal-replacement/
www.classiczcars.com/topic/22262-r180-differential-leaking-what-to-check/?p=189431
Detailed info and specs on R180 Differential (PDF)
240Z Half Shaft Refurbish (WoodWorkerB)