The design of the Datsun 240Z blinker switch is both quite clever and not so good – at the same time. I very much appreciate the thought that went into it’s design, but I am not pleased that all the current for the lights goes through this small switch. After you clean-up this switch, I’d strongly suggest converting to LED blinkers and brake lights – this will reduce the current demands through this switch considerably.
This page is divided into three parts: Blinker Switch Wiring & Schematic, Blinker Switch Repair, entire Blinker Assembly.
Blinker Switch Wiring & Schematic
Figure 1 shows the complete assembly of switches from the steering column. In the foreground is the blinker & hi/low beam assembly. In the background is the headlight/running light switch, windshield wiper & washer controls.
Figure 2 shows the back of the blinker switch. Each of the 6 wires is indicated. At the “top” (as installed on the steering column) is the right-side lights (front and rear), to the bottom are the left-side lights (also front and rear).
Note: in the rear, the blinker and brake share the same lights/bulbs. The blinker switch has to do some clever connections to make this all work.

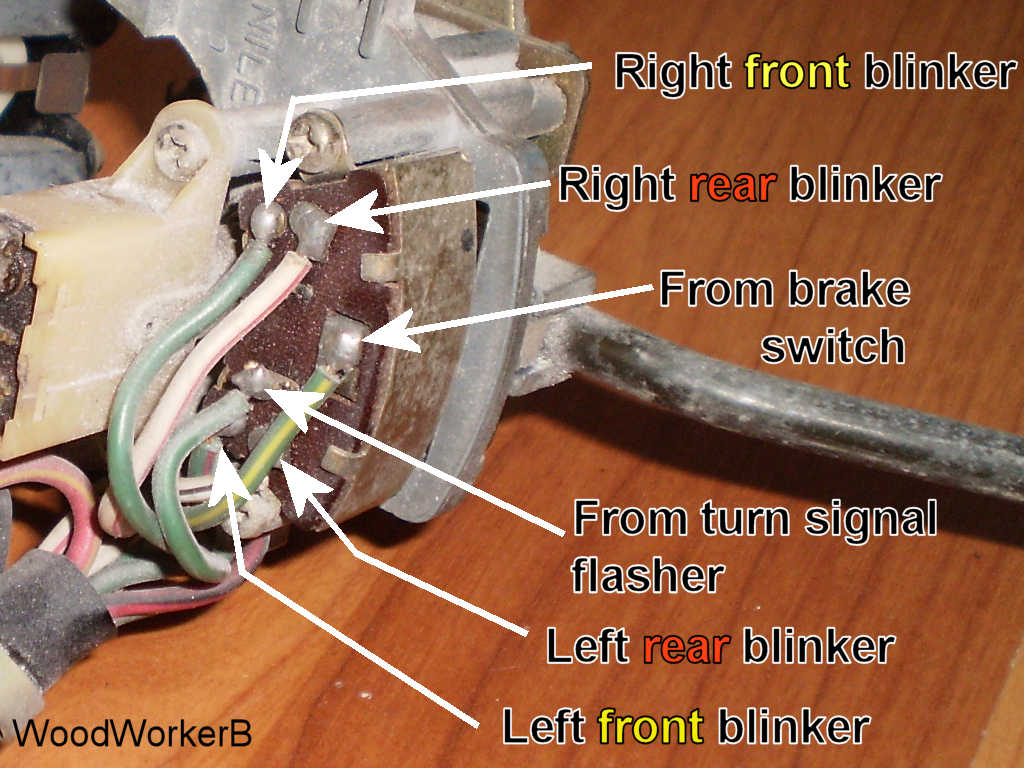
I’ve tried to illustrate what-gets-connected-to-what using colors. There is no significance to the colors other than to indicate the different circuits
Neutral
The brake switch (under the dash, activated by pressing the brake pedal) is connected to both right and left rear turn signal/stop lights. There is no connection to the front blinkers.

Left Turn
Red: The brake switch is connected to only the right rear stop light.
Green: The turn signal flasher is connected to the left front turn signal and the left rear turn signal/stop light.

Right Turn
Red: The brake switch is connected to only the left rear stop light.
Green: The turn signal flasher is connected to the right front turn signal and the right rear turn signal/stop light.

Opening the switch.
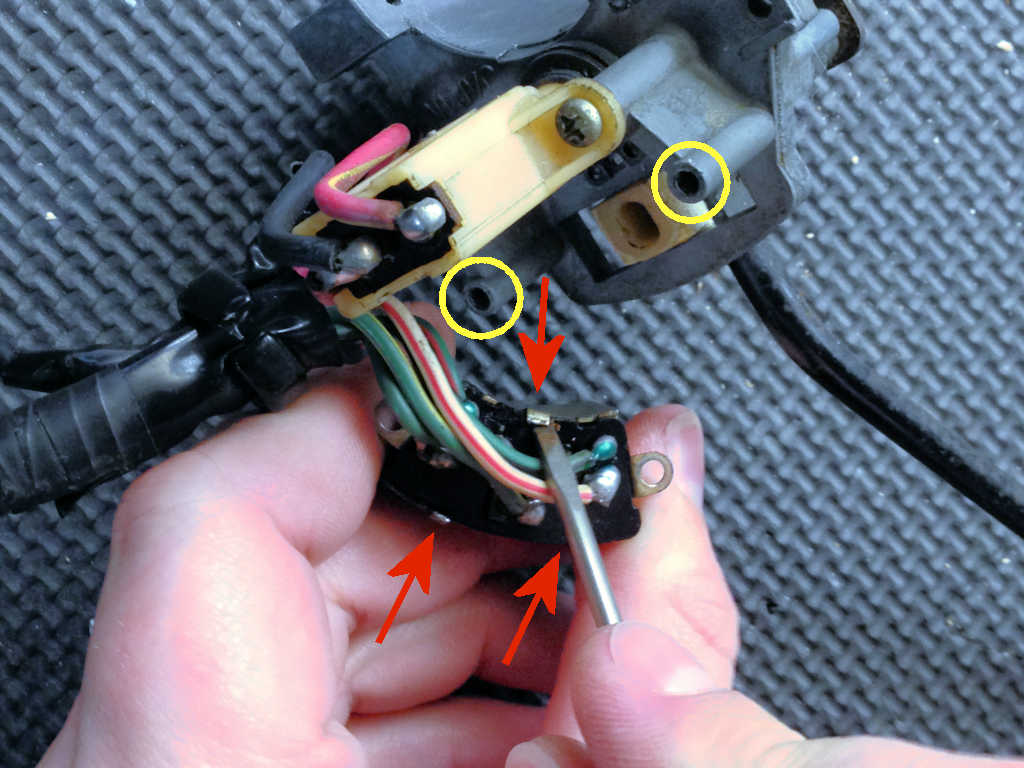
Figure 5 – remove the two screws holding the switch in place (yellow circles). With a small flat-blade screw driver, carefully pry-up the three holding tabs. Do this by lifting up on the screwdriver – do not press down and put pressure on the wires. All care must be taken to not damage the phenolic switch base (the brown part).
The switch components
Figure 6 – The ‘insides’ of the blinker switch assembly. Note: the wires were removed from this switch before the photos were taken.
- The switch body and slide mechanism. The other side of the slide mechanism fits into a hole in the blinker lever assembly. This component moves ‘up and down’ with the blinker lever.
- The spring and ball bearing. The spring slips into the slide mechanism and the ball bearing perches on top of the spring. This spring-and-bearing assembly is what rides on the switch mechanism (#4) and causes it to ‘flip’ from side to side – exactly like a seesaw.
- Two mounting screws to secure the complete switch assembly to the blinker assembly (see Fig 1).
- Top half of the switch mechanism. The lower half is riveted to the switch base (#5)
- Switch base. The brake-light disconnect switch is part of this assembly (red arrows in Fig. 8).
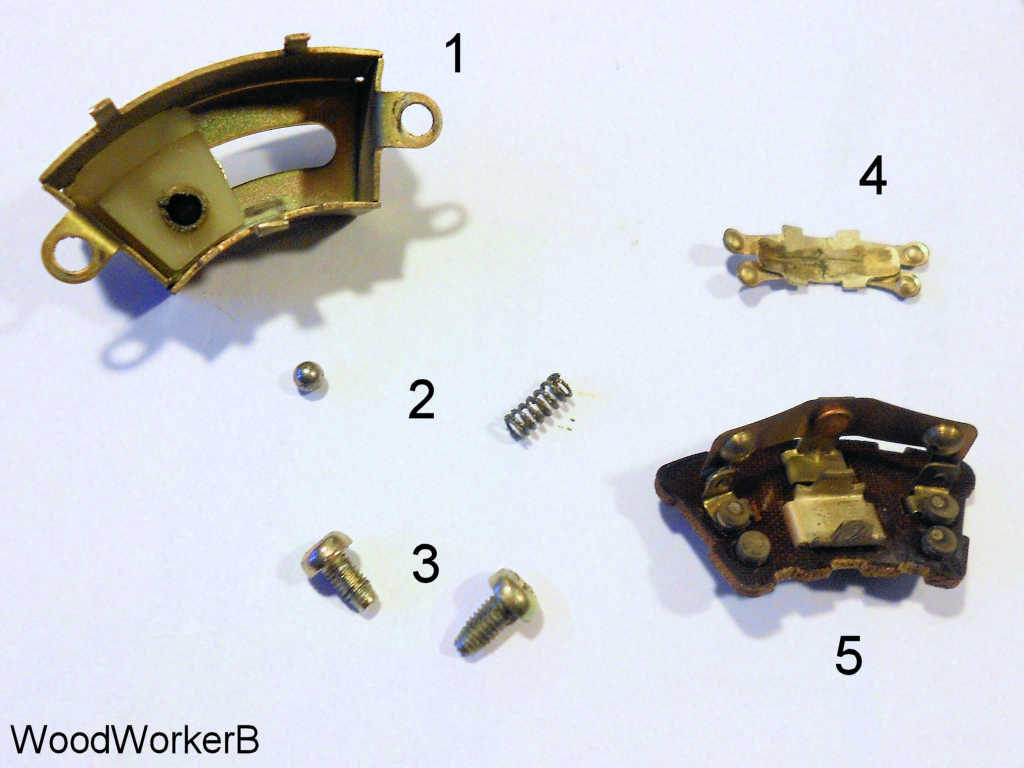
Fig 6. All the blinker switch parts, exploded view. (click for larger image)
Switch contacts
Figure 7 shows the switch contacts at 20x magnification.
A & B show both sides of the contacts before any clean-up. Notice the burning and “pock marks” caused by years of switching. The upper contacts – the ones with the most damage – are the brake lights. They take a bit extra beating because more bulbs are being driven (e.g. more current).
C & D show the contacts after some light sanding with 600 grit sandpaper. Notice the switch surfaces are now clean of carbon and metal build-up. The ‘pock marks’, however, remain clearly visible. You only need to sand enough to get the surfaces shiny again. The less sanding, the better.
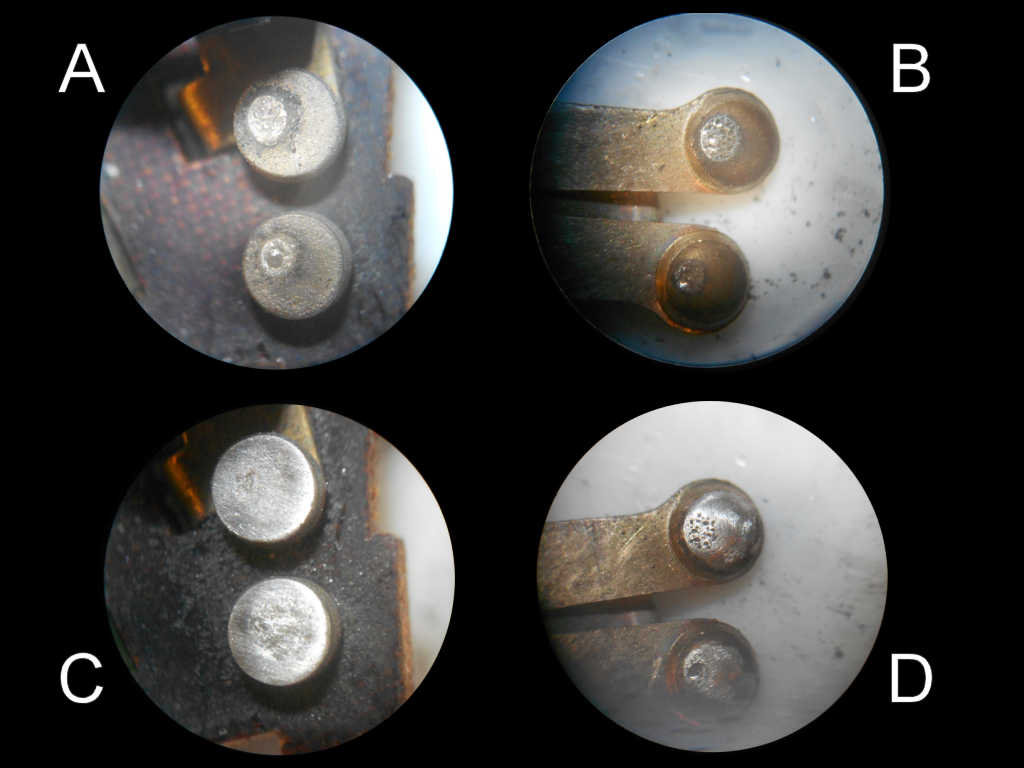
Fig 7. Blinker switch contacts, 20x magnification. A & B before, C & D after light sanding. (click for larger image)
Figure 8 shows the last two contacts that need to be cleaned. Gently open the contacts, slide the sandpaper in, then let the switch close, pinching the sandpaper. Slide the paper back-and-forth a few times, then flip the sandpaper over to clean up the other side of the contact. Repeat for both contacts.
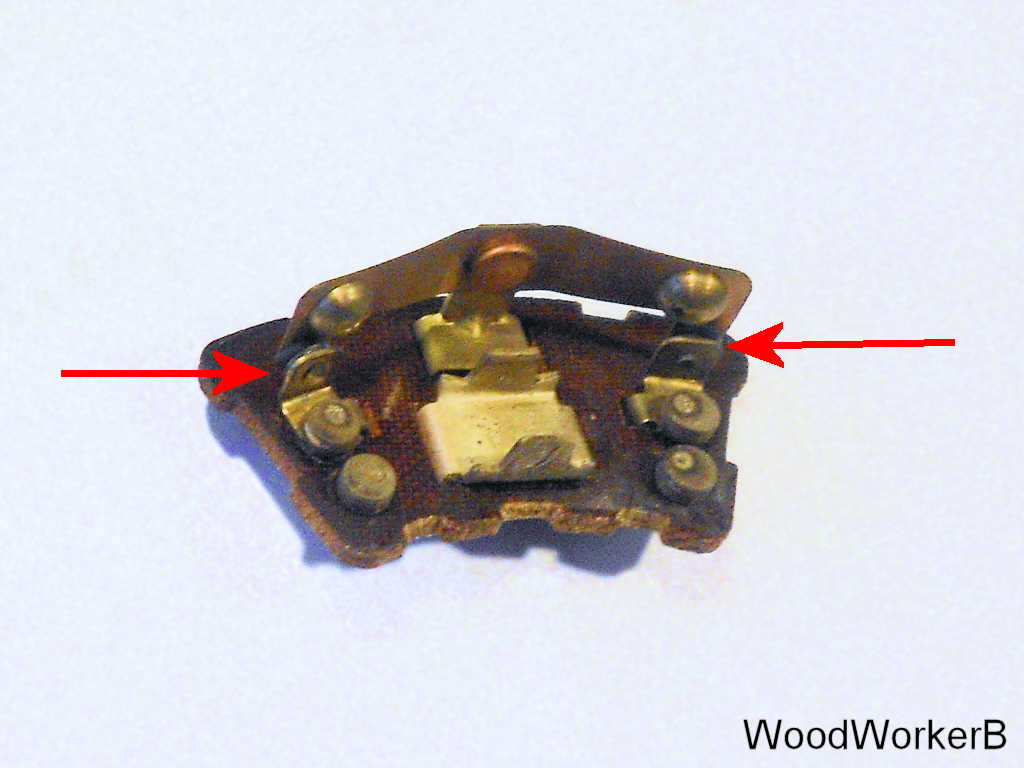
Fig 8. Blinker switch contacts for the brake light power from brake switch. (click for larger image)
Troubleshooting tip
If your rear blinkers work, but one brake light does not (remember, rear brake and blinker lights are the same), then all bets are that you’ve got a corroded contact for the brake lights (red arrows in Fig. 7).
Reassembly
Reverse the disassembly order. Put a small dab of grease on the top of the spring to “stick” to the ball bearing. Make sure the spring/ball bearing assembly is in the right place and did not fall apart before you re-bend the three mounting tabs.
If you do use any grease, use it sparingly and keep it away from all 6 of the contacts. I would suggest a LITTLE grease where the ball bearing slides on the ‘seesaw’ part of the switch mechanism.
Fixing the Blinker Mechanism
My blinker mechanism was giving me a little bit of grief. For left turns, I had no problem. For right turns, however, the blinker wouldn’t come on. I need to give the blinker lever a good, firm push upward to get the blinker to come on. The actual switch itself was fine, but something in the mechanism wasn’t ‘going all the way’ and switching the switch. See my solution: Blinker Mechanism Repair

Other reading
Turn Signal Switch Spring & Ball (Classic Zcar Club blog). Includes some additional excellent photos.
Turn Signal Repair (Fiddling with Z Cars).
Under Construction